Posted by: lifewithbs | June 19, 2012

Our Square Foot Garden

For the past several years I have wanted to start a vegetable garden. It was impossible when we lived in an apartment in DC, since we didn’t have an outdoor space. When we first moved to Texas I had a few failed attempts at growing tomatoes, and really at keeping any plants other than cactus alive. It’s just too dang hot here! You need to water several times a day. Now that we moved into a house with a front porch and a little bit of shade, it was time to try again.

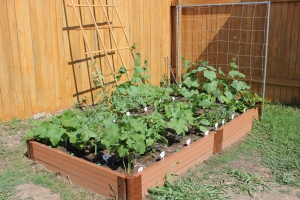
I’ve had some success with keeping our new front garden and a few containers of tomatos alive. We started talking about the vegetable garden and Brett surprised me for Mother’s day by building me a 8×4 raised garden bed!

It turned out to be a much larger project than we anticipated, but it has been worth the effort. He built the trellis at the end, and we purchased the wooden one. My sister suggested we got a drip hose and a timer, and I’m so happy she did! It ended up being a lot less expensive than we originally thought and it has been soooooo nice to not have to worry about watering. Our plants get watered every six hours (it’s insanely hot here) for 10 minutes.

We planted malabar spinach, 2 types of cucumbers, 4 types of watermelon, 4 types of squash (green zucchini, yellow zucchini, crookneck, straightneck) one eggplant, a spicy bell pepper, a non-spicy jalapeno, 3 types of okra, 3 types of little melons, parsley, oregano and sage. Phew!

We found a great local nursery where they gave us lots of advice and where they sell only varieties that do well in this crazy Texas heat.

After two weeks:

The staff at the nursery recommended we try the Square Foot Gardening method where you mix your own “soil”, and divide the bed up into squares. We also got the book to help us plan it out, and it was a huge help! I am not too familiar with the “old” type of gardening in rows, but this method makes a lot of sense to me. There are also lots of online forums where you can ask questions and get advice, so I’m very glad we decided to go this route. While I love the idea of gardening, and have some basic knowledge and skills, planning out and maintaining this big vegetable garden is beyond my capabilities. We’re kinda winging it, and I’m sure we’ll learn a lot as time passes.

So far, the plants are thriving! I’ve been enjoying being able to go to the garden to get spinach and herbs as I need them. We just harvested and ate our first three okra last night, and have a few melons, squash and cucumbers growing.

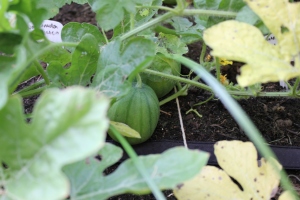
Here is the biggest melon we have so far. It might make me a big nerd, but I just think it’s so cool watching these plants grow!

Beautiful Okra flower:

I’m struggling with pest control right now. We have a huge cucumber beetle infestation. I thought we had cute yellow ladybugs, but no… they were pests. We got some neem oil and a sprayer, so we can try to control the bugs organically. It seems to be a little effective.. not VERY effective. I still have big holes in most of my leaves and they’re just taking over most of my blooms. I’m hoping if I can spray every few days I can keep the bug population down to a level where we can actually get some fruits/veggies.

Still, even though we have lots of pests, our plants are persevering. Hopefully we can win the battle.

Bell peppers:

Baby watermelons:

We harvested three Okras from the garden last night and I made some Cheesy Okra Fritters. It was my first time cooking with Okra and first time frying… and they turned out well! I took some pictures of the process, hopefully I can get a recipe post up soon.

In other news, Drew and  I will be headed to Connecticut later this week for six whole weeks! We will miss Brett dearly, but I am super excited to see my friends and family, and to introduce Drew to everyone. Brett is going to come out about halfway through our trip so he doesn’t have to go that long without seeing his pride and joy. I’m nervous about flying by myself with the baby, but know that getting to see everyone will be worth it!

Brett will be in charge of the garden while we’re gone… so we’ll see how that goes!

Posted by: lifewithbs | June 11, 2012

Baby Drew!

As you may have guessed from the lack of postings here for the past 9+ months, the baby has arrived! And he has been keeping me very, very busy!

Andrew Allen (nickname Drew) was born on August 29th, 2011 at 7:30 am.  He has brought an incredible amount of joy into our lives, we are so blessed!

It’s hard to catch up on 9 months in one post, but here are a few pictures.

He started off tiny, just 6 pounds, 14 ounces!
One month old, with Daddy.

One of his first smiles

Drew was a banana for Halloween… and Brett scared all of the neighborhood kids in his gorilla costume

Our first Christmas. It was strange for Brett and I to not spend the holiday with our families, but we started new traditions with our little family of three (plus Izzy!)

Drew just keeps getting bigger… and cooler…

My handsome Valentine.

He loves to play ball, and can now roll over both ways and is starting to crawl!

Bath time is always fun. We have tons of rubber ducks!

He’s getting better with eating solids. This is what happens when I let him hold the spoon.

We spend a lot of time at our neighborhood pool. It’s the only way to survive this Texas heat.

And here is his 9 month picture. He has six teeth so far and weighs over 20 pounds!

So there you have it! I have tons of better pictures, these all came from my phone, but our good computer (and all my pictures) is out of commission for the moment. Figured I should get this post up when I had the time and motivation.

My plan is to post more regular updates, and hopefully to get back into cooking/baking too.  We also recently planted a big vegetable garden so I’m going to try to keep track of the progress here too.

Oh and Izzy is doing well. She has gotten used to the idea of a new family member, and likes to lick Drew’s feet. He adores her, it’s really sweet to see.

Posted by: lifewithbs | August 25, 2011

Cinnamon Sugar Pull-Apart Bread

We are still waiting, waiting, waiting!

For some reason, I thought this baby would come before his due date. At least a week before. But, I turns out I may be wrong. Our little “B” is due on Saturday and there still has been no sign he will be arriving soon.

So for now we wait, and I get to catch up on my reading, TV shows and recipes I’ve been wanting to try.

This one looked particularly good, and since Brett loves anything with cinnamon sugar and we had all the necessary ingredients in the house it seemed like a no-brainer.

Cinnamon Sugar Pull Apart Bread
recipe from Joy the Baker

Dough:
2 3/4 cups plus 2 tablespoons all-purpose flour
1/4 cup granulated sugar
2 1/4 teaspoons (one envelope) active dry or rapid rise yeast
1/2 teaspoon salt
2 ounces (half a stick) of butter
1/3 cup milk
1/4 cup water
2 eggs, at room temperature
1 teaspoon pure vanilla extract

Filling:
1 cup granulated sugar
2 teaspoons ground cinnamon
2 ounces (half a stick) of butter, melted and browned

In a large mixing bowl, combine 2 cups of flour, sugar, yeast and the salt. Set aside.

Whisk together the eggs and set aside.

In a small saucepan, combine the milk and butter, until the butter has just melted. Remove from the heat and the water and vanilla extract. Let cool for a few minutes until the mixture is between 115 and 125 degrees.

Pour the milk mixture into the dry ingredients and mix with a spatula. Add the eggs and stir until all ingredients are incorporated. It takes several minutes for everything to come together.

Add 3/4 cup flour and mix. The original recipe said to mix with a spatula, but I had to turn the dough out onto the counter and knead for a few minutes to get the rest of the flour incorporated.

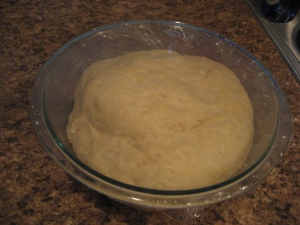
Place the dough in a large greased bowl (spray with some Pam!), cover with plastic wrap, and let rise for about an hour until it doubles in size.

While the dough rises, mix together the sugar and cinnamon and set aside.

Once the dough has almost doubled, grease a 9x5x3 loaf pan and melt the butter until browned.

Deflate the dough and knead in the remaining 2 tablespoons of flour.

Cover with a kitchen towel and let rest for about 5 minutes.

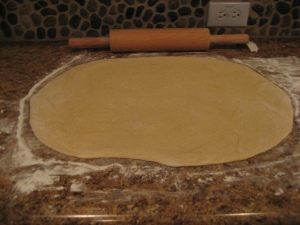
On a lightly floured surface, roll the dough out so it is about 2o inches long and 12 inches high.

Using a pastry brush, spread the butter evenly onto the dough. Sprinkle with the cinnamon sugar.

Slice the dough vertically into six even strips.

Stack the strips on top of each other, and cut into six squares.

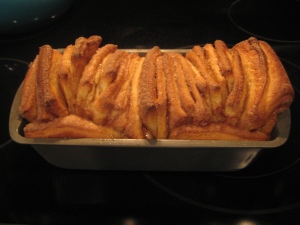
Layer the squares into the loaf pan, as shown below.

Place a towel over the loaf pan, and let rise for about 30 to 45 minutes until the dough almost doubles. Preheat the oven to 350 while the dough rises.

Bake the bread for 30 to 35 minutes, until the top is golden brown.

The original recipe says to let the bread rest for 20 to 30 minutes before removing it from the pan and serving. We couldn’t wait that long, since it smelled so good and Brett had to get to work, so we probably only let it sit for about 5 minutes before digging in. No harm done 🙂

This bread looks cool, was fun to eat, and tasted fantastic. And, I was able to make it without leaving the house to get more ingredients!

Posted by: lifewithbs | August 21, 2011

Peach Crisp

We made it to 39 weeks! Still waiting for baby to make his arrival. These past few weeks I have been cooking and baking, both to pass the time and to stock the freezer. While my baking escapades have not been very productive to prepare for the baby, hopefully all my cooking and freezing will pay off. I made a lasagna and some chili for the freezer, to save for when baby gets here and we will need quick and easy dinners. I also made a sauce with meatballs, recipe to come soon!

While shopping for items to stock the pantry and freezer, I picked up a bunch of peaches on sale. Peaches are excellent right now, and while I usually prefer to just eat the fruit raw and fresh this time I was looking for a new baking project, so decided on this peach crisp.

Peach Crisp
recipe from All Recipes

6 fresh peaches: peeled, pitted and sliced into bite-size pieces
1/2 teaspoon almond extract
juice from half a lemon
1/2 cup all purpose flour
1/2 cup old fashioned oats
1 cup white granulated sugar
1/4 cup light brown sugar
1/2 teaspoon ground cinnamon
1/4 teaspoon salt
1/2 cup butter

Preheat the oven to 375 degrees and grease an 8 x 8 baking dish.

Peel, pit, and chop the peaches, and place them in the bottom of the baking dish. Add the lemon juice and almond extract, and stir to combine.

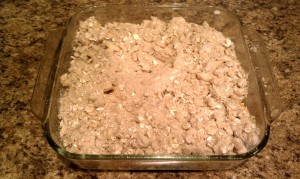
In a bowl, combine the flour, oats, sugars, cinnamon, and salt. Cut in the butter using a pastry cutter until the mixture looks crumbly.

Spoon the mixture in an even layer over the peaches.

Bake for 45 minutes until the top is golden brown and the juice is bubbly.

Serve with vanilla ice cream, or however you’d like! This peach crisp was even better the next day, after it had sit overnight in the fridge and all the juices had been reabsorbed.

As for the rest of us, Izzy seems to be getting frustrated from the lack of walks. It’s just too hot to take her out during daylight, and I have been too tired to take her out at night. Here in Central Texas, we have had 67 days of 100+ degree weather this year so far. Its pretty ridiculous.  Thankfully, we have really good air conditioning. I can’t imagine what it would be like to live here without electricity and air conditioning…

We have promised Izzy lots of walks and time at the dog park once baby gets here. Although I think she has been missing all the  outdoor time, she has been enjoying all the activity in the kitchen, and helps me taste just about everything.

She helps to lick all the plates, bowls and utensils clean 🙂

Brett has worked every single day in August, and is looking forward to a much needed break later this week. We’re hoping the baby comes during his time off! Our friend took a bunch of pregnancy pictures for us the other week, here are a few.

Posted by: lifewithbs | August 6, 2011

Everything Bagels

So, we made it to 37 weeks! The baby is now full term, and now we just wait until he decides to make his arrival. The nursery is almost done. We got and set up the glider earlier this week, that was the last big piece of furniture we needed. The crib is all set up and prints have been ordered for the walls. Now, all we need is the baby!

In order to pass the time I’ve been doing a lot of baking. Last week I was craving bagels… and not the kind you get in the bread section of the grocery store. Real New York-style bagels. Unforutnately, our part of Texas is seriously lacking in the bagel department. So, I found this recipe over on the Brown Eyed Baker’s Blog (I seem to be making everything from her blog these days…). The recipe comes from my favorite bread book, The Bread Baker’s Apprentice. I’ve been wanting to try this recipe for a while, and a weekend alone at home seemed like the perfect time to give it a go.

Bagels

recipe from the Brown Eyed Baker and the Bread Baker’s Apprentice

For the sponge:

1 teaspoon instant yeast

4 cups (18 ounces) bread flour

2 1/2 cups water, at room temperature

For the dough:

1/2 teaspoon instant yeast

3 3/4 cups (17 ounces) bread flour

2 3/4 teaspoons salt

1 tablespoon honey

To finish: 

1 tablespoon baking soda

cornmeal or semolina flour for dusting

Everything bagel topping

Everything bagel topping: (enough for 12 bagels)

4 teaspoons poppy seads

4 teaspoons sesame seeds

4 teaspoons dried garlic (minced or flaked)

4 teaspoons dried onions (minced or chopped)

2 teaspoons kosher salt

First day: 

To make the sponge, combine the yeast and flour in a mixing bowl. Add the water and mix until it forms a smooth, sticky batter.

Cover the bowl with plastic wrap, and let it sit at room temperature for about 2 hours, until it  becomes bubbly doubles in size.

To make the dough, add the additional yeast to the sponge and stir. Add the three cups of flour, the salt, and the honey, and stir. You can also mix on low speed with a dough hook. Combine until the ingredients form a ball, working in the extra 3/4 cup of flour slowly.

Transfer to the counter and knead for at least 10 minutes, or knead for 6 minutes on medium speed with the dough hook. I like to let the mixer do most of the work, and then finish off kneading by hand to see how the dough feels. The dough should be firm, but pliable and smooth, not too sticky. Add more flour or water if needed.

Divide the dough into 12 even pieces. I used my handy kitchen scale to make sure all pieces were equal. Form the dough pieces into rolls.

Cover the rolls with a damp cloth and allow to rest for about 20 minutes.

Line two baking sheets with a silpat or parchment paper, and mist lightly with spray oil.

Form each roll into a bagel by punching a hole through the middle of the roll, ensuring the bagel is of even thickness all the way around.

Place the bagels on the the prepared baking sheets, at least two inches apart. Spray lightly with spray oil, and cover with plastic wrap.

Let the pans sit for about 20 minutes. Test if they are ready to be refrigerated by using the float test. Drop a bagel into a bowl of water. If it floats within 10 seconds, they’re ready to go into the fridge. Test one bagel. If it floats within 10 seconds, place both pans into the fridge, still covered, to retard overnight. If the bagel doesn’t float, take it out of the water, pat dry, wait another 20 minutes and try again. My tester bagel floated right away 🙂

Day two: 

The next day, when you’re ready to bake  your bagels, take the pans out of the fridge.

Preheat the oven to 500 degrees, with two racks in the middle of the oven.

Bring a large pot of water to boil, adding the baking soda. Have a slotted spoon or skimmer nearby.

Carefully drop the bagels in the boiling water, just a few at a time. Boil for one minute per side, and then flip.

While the bagels are boiling, sprinkle the baking sheets (lined with parchment paper or silpat) with cornmeal or semolina flour. When both sides of the bagels are boiled, place on the sheets and immediately add your topping.

I decided to use everything bagel topping, since that’s my favorite, but you can obviously do whatever you want.

Once all the bagels are boiled and topped, place in the oven and bake for 5 minutes. Rotate the pans 180 degrees, and switch oven shelves, lower oven temperature to 450 and bake at least another 5 minutes.

Let the bagels cool on a wire rack for at least 15 minutes before serving. Enjoy!

These bagels didn’t turn out as puffy as the ones I’m used to, but they were delicious and smelled amazing. I certainly enjoyed them, my craving was satisfied.

Posted by: lifewithbs | July 8, 2011

Patty Melt

Sometimes you  just need a burger.

The other night I was feeling a little grumpy due to car troubles and an over abundance of hormones, but perked up considerably when I realized we had all the ingredients needed to make a patty melt. A good burger is a guaranteed way to put me in a better mood. Thankfully, patty melts are easy to make and don’t require the grill.

You don’t really need a recipe for patty  melts, but here’s how I make mine.

Patty Melt

1/3 pound of ground beef

1/4 yellow onion, sliced

2 pieces bread, preferably rye

2 slices american cheese

salt and freshly ground black pepper, to taste

butter

First, melt about a tablespoon of butter in a small skillet over low heat. I find a regular skillet, not a non-stick, works best. Slice the onion and stir into the butter. Stir often, as the onions caramelize.

Next, form the ground beef into a patty. Salt and pepper both sides generously.

Melt a little butter over medium heat in a non-stick skillet, and add the burger.

Cook about 7 minutes, then flip.

Cook about another 5 minutes, until it is almost to your desired doneness. For me, it was to 155 degrees. The burger will continue to cook a bit as you grill the sandwich.

Transfer the burger to a plate temporarily, and use a spatula to dispose of most of the pan drippings. Add in a little bit more butter, and lay one of the pieces of bread on top. Top with one slice of cheese.

Add half of the carmelized onions.

Next the burger… then the rest of the onions. Finish it off with the remaining slices of cheese and bread.

Let it cook a few minutes, and use a spatula to gently smush the sandwich together. Use two spatulas to flip (one to hold the sandwich together, and one to flip).

Cook another few minutes until both sides of the bread are grilled, and you’re done!

I paired mine with some tater tots. Definitely not the prettiest or healthiest meal ever, but it sure did hit the spot and lift my spirits.

Brett is now on his 13th day of work in a row. The poor guy gets tomorrow off, but then its back to working non stop. I have come down with a cold and am looking forward to sleeping a lot this weekend.

I’m pretty sure Izzy will be more than happy to keep me company 🙂

Posted by: lifewithbs | July 3, 2011

Trip home + Pasta with Pesto Cream Sauce

I just came back to Texas after a two week trip visiting friends and family at home in Connecticut. It was wonderful to be able to spend time with everyone, shop, cook and relax!

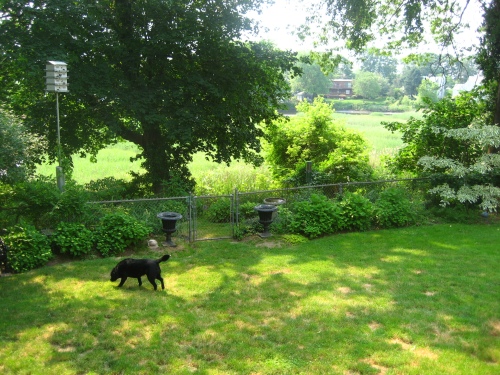
My parents’ backyard seemed like a rainforest when compared to the scenery we have in Texas.

We are in the midst of a terrible drought here in Central Texas, the worst since the early 1900s. Watering the yard and washing the car are both banned on certain days, and most of the 4th of July fireworks shows are cancelled due to risk of fire. Temperatures have climbed into the 100s almost every day these past few weeks. It’s not a very hospitable environment for a gal that is now eight months pregnant and was not very heat tolerant to begin with!

But anyways, I really enjoyed myself at home hanging out with family…

Spending weekends in NYC with friends…

And spending downtime with the dogs…

Of course we did a bit of cooking, too. One night my mom requested something “fresh, light and summery”, so I decided to make this pesto pasta dish I had seen over on the Pioneer Woman’s site. I don’t know if it can be considered light, since it does contain heavy cream… but nobody complained  and I think the meal was enjoyed by all.

Pasta with Pesto Cream Sauce
recipe from the Pioneer Woman

1 pound dried pasta

3/4 cup fresh basil leaves

1/2 cup plus 1/4 cup freshly grated Parmesan cheese

3 tablespoons pine nuts

2 cloves garlic, peeled

Salt and pepper to taste

1/3 cup extra virgin olive oil

1/2 cup heavy cream

2 tablespoons butter

3 roma tomatoes, seeded and diced

First, make the pesto.  Put the basil, 1/2 cup Parmesan, pine nuts, garlic cloves, salt and pepper into a blender or food processor and turn on to combine.

A food processor would definitely be easier, but the blender worked out alright.

Add in the olive oil, and continue to blend until combined, adding more olive oil as needed.

Meanwhile, put a pot of water on to boil and cook the pasta.

While the water is boiling, heat the cream and butter in a saucepan over medium-low heat.
Chop the tomatoes while the butter is melting.

Once the butter and cream are combined and smooth, stir in the pesto. Add in the remaining Parmesan and stir until combined.

Drain the pasta, and add it to the saucepan with the pesto mixture, toss to combine.

Mix in a scoop of diced tomatoes with each serving and top with grated parmesan cheese, if desired.

Delicious! This definitely tasted fresh and summery, and there wasn’t enough cream to make it feel heavy. All I need to do now is to convince Brett to start liking basil and this could become a regular in the meal rotation. 🙂

In other news, we are working hard to get ready for the baby. Just 5 more weeks until I reach full term! Everything has been going well and we are really excited to meet the new “B”.

Here he is at our 28 week ultrasound.

Posted by: lifewithbs | May 14, 2011

Delicious Ham and Cheese Bread

This bread made me very happy. It came out of the oven looking, smelling and tasting amazing, and was easy to make. The loaf did not last very long at our house, but was still fresh and moist two days post-baking. About 20 seconds in the microwave bring is back to its freshly baked taste.

Ham & Cheese Bread

recipe from TiggyBee over at Food52

3 cups all purpose flour

1/2 teaspoon active dry or rapid rise yeast

1 teaspoon salt

1 1/2 cup warm water

3 ounces proscuitto, cubed

4 ounces gouda cheese, cubed

In a large mixing bowl, combine the flour, yeast and salt. Slowly add the warm water, and stir until you get a rough looking dough.

Cover the bowl with plastic wrap and let it sit overnight. I let mine sit out on the table in the kitchen overnight, and then put it in the fridge while I was at work.

The next day, take the dough out of the fridge about an hour before you want to bake. Chop up the proscuitto and cheese into cubes. The original recipe called for smoked provolone. I couldn’t find it at the store, per usual, so ended up going with Gouda cheese. It worked out perfectly.

Mix the ham & cheese into the dough with your hands. Once the dough is mostly mixed, dump it out onto a floured surface and finish mixing.

Place the dough in a large clean bowl, cover with plastic wrap or a towel and let sit until it doubles in size. While the dough doubles, preheat the oven to 400 degrees, while a dutch oven is in there.

After the dough has doubled in size, carefully transfer it to the pre-heated dutch oven, and bake covered for 30 minutes.

Uncover, and bake for an additional 20 minutes. Your apartment/house will smell amazing!!

Delicious! If I ever start my own bread shop, this loaf (or something similar to it) will definitely have to be on the menu.

Here’s a picture of me and Izzy enjoying the (very) brief season when you can actually find some green in Texas.

Posted by: lifewithbs | May 14, 2011

A new “B”

I know it’s been quite some time since I’ve been able to post anything here. But, that should now be changing. I’m done with school for a little bit so will have a lot more time to devote to cooking and blogging. Also, we’ll soon be moving to a new house in a new town closer to Austin with a MUCH better kitchen. Yay!

But, the most exciting news of all is that we’ll soon be welcoming a new “B” into our lives.

A baby! And, to fit into the whole “B” theme,we were very surprised to learn that it’s a boy!

I’m due around the end of August, and we couldn’t be more excited! Especially Izzy, she sported her blue bandana to celebrate.

We are trying to teach her not to howl so loudly whenever someone comes home or guests arrive 🙂

So, at least until August, you should be seeing more frequent posts on here. I have a whole backlog of recipes to get up. Once the baby comes I can’t make any promises, but will do my best to post pictures and updates.

Posted by: lifewithbs | March 20, 2011

Lemony Ricotta Pasta

This is one of our favorite easy meals. We end up eating pasta a lot, and this is kind of a way to mix it up with a ricotta sauce instead of tomato sauce. It’s best with really fresh ingredients, the one time I was able to get fresh ricotta from the farmer’s market this was pretty much the best thing I had tasted. Usually I bust out my expensive olive oil, but you can use any kind, just make sure it is extra-virgin.

Lemony Ricotta Pasta

recipe from the kitchn

1 pound pasta, in a short twisted shape or with a hole

1  15 ounce (about 2 cups) package fresh ricotta cheese

1/2 to 3/4 cup freshly grated parmesan cheese

2 tablespoons good-quality olive oil

zest of 1 lemon

juice of one lemon

1/2 teaspoon coarse salt

1/2 teaspoon freshly ground black pepper

Set a pot of water to boil. When it boils, add a few teaspoons of salt and the pasta.

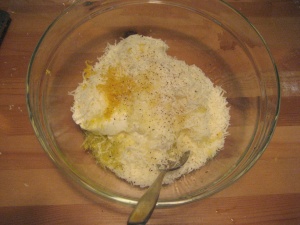
In a metal or glass bowl wide enough to fit over the top of the pot, mix together the remaining ingredients.

When there are about 2 minutes remaining in the pasta’s cooking time, place the bowl over the pot and slowly stir the ricotta and other ingredients. You should see it loosening as it warms.

When the pasta has finished cooking, mix it with the ricotta sauce, and serve.

Not the most photogenic dish, but it tastes fresh, reheats well and is super quick to make. Two notes: that bread you see is the baguettes described in the previous post, and the original recipe calls for adding shredded fresh basil at the end. It’s great with the basil, but I leave it out because Brett doesn’t like it.

Enjoy!

Older Posts »

Categories